Most commonly, Dell laptops have a separate key to enable you to print the entire screen as you saw on laptops. This key is located in the first row of the laptops, either a separate key or combined with a function key (F10) depending upon the Dell model that you are using. Sometimes back, nobody thought about such a tool that allows you to capture exactly what’s shown on your screen, in such a simple way. This article will show you how to screenshot on Dell Laptop.
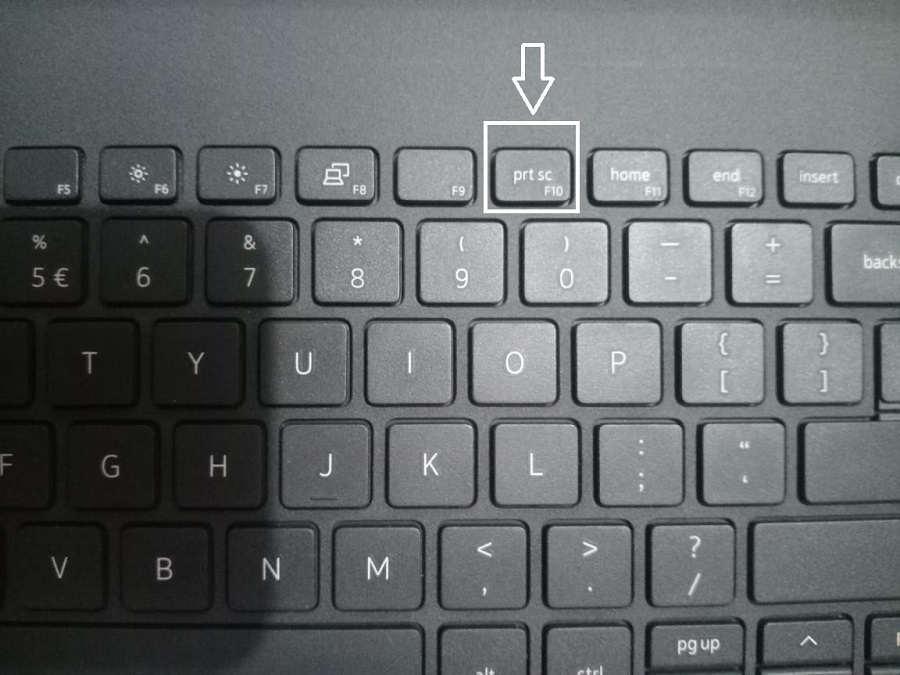
Print Screen key appeared in the keyword with the name “Prt Sc” or “Prnt Sc”.
There are a number of ways to take a screenshot on your Dell laptops and computers. We will walk you through several methods, just follow this article and you will get to know about all these ways.
Table of Contents
What is a Screenshot?
A screenshot is an exact image that captured what is displayed on the screen. You can capture a particular application, webpage, homepage, or whatever you want to capture from your laptop.
A screenshot is an amazing resource for personals and professionals, you can easily explain what is in the screen that needs to be edited, removes, or click on a particular option for a specific action to perform.
Nowadays, if you complain about an issue to any IT or web support teams, they often ask for a screenshot, since it is much easier to understand them and it is more convenient to you as well, to explain to them about the issue that you are facing.
How to Screenshot on Dell Laptop
There are several ways to grab a screenshot from your Dell laptops, we are here explaining to you several methods as to how to screenshot on a Dell laptop, regardless of what Dell model or series you are using.
These methods will work for every model and series of Dell.
Method 1: Take a Screenshot, if you are using Windows 8 and Windows 10
You will find the print screen key in the first row of your Dell laptop, either on the same row where function keys are located or combined with F10 (function key) itself. You can take a screenshot by following these simple steps:
Step 1: Navigate to a page that you want to take a screenshot of, and you can be able to capture a screenshot of everything that shows on your screen including task and menu bar, but except the mouse cursor.
Step 2: Now press the “Windows Key” + “Prt Sc Key” button simultaneously, your screen will dim slightly for a second, which is a confirmation that the screenshot has successfully performed and saved. In case the screen doesn’t dim, try to hold down “Windows Key” + “Prt Sc Key” a little harder.

Step 3: Now, go to the “Start” button located in the bottom-left of the screen. The Start menu will appear and your mouse cursor is a blink in the “Search Field”.
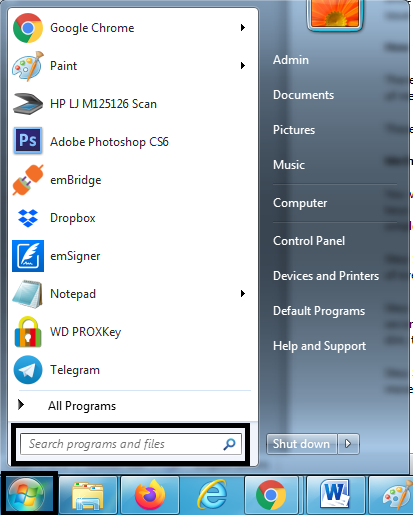
Step 4: Type “Screenshots” in the search field, and you will see a folder named “Screenshots” appear at the top of the window.

Step 5: Now, click on the same folder and you will find the screenshot file inside that folder.
Method 2: Take a Screenshot, if you are using Windows XP and Windows 7
Step 1: Navigate to a page that you want to take a screenshot of, and you can be able to capture a screenshot of everything that shows on your screen including task and menu bar, but except the mouse cursor.
Step 2: Now press the “Prt Sc Key” button, and your screenshot has successfully been copied on the clipboard.
Step 3: Now, go to the “Start” button located in the bottom-left of the screen. The Start menu will appear and your mouse cursor is a blink in the “Search Field”.
Step 4: Type “Paint” in the search field, and you will see “Paint” software appear at the top of the window.

Step 5: Now, click on it and you will be directed to the “Paint” software.
Step 6: Once you inside the software, paste your screenshot by “Ctrl + V”, and your screenshot will be pasted in the file.
Step 7: Now, go to the File menu and click on “Save”, to save the file on your laptop.

Method 3: Take a Screenshot, if you are using Snipping Tool
Step 1: Click on the Start button and type “Snipping Tool” in the search field, the “Snipping Tool” will appear on the top of the window. Click on it to open.

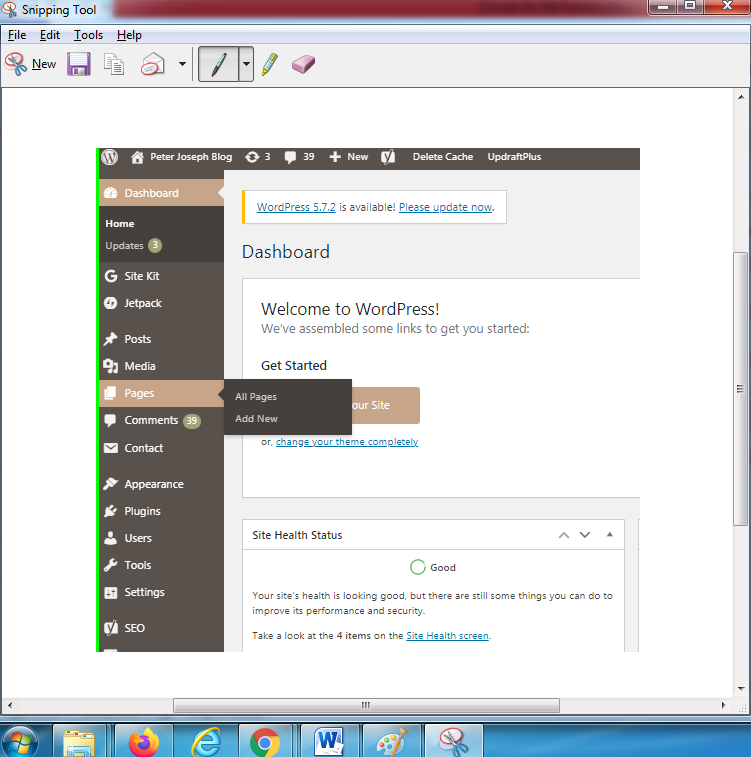
Step 2: A below image will appear on your screen, wherein you have to click the “New” drop-down button to select a shape type.

Step 3: The default shape is “Rectangular”, but you can choose any other snip as well, including Free-form Snip, Rectangular Snip, Window Snip, and Full-Screen Snip.

Step 4: Once you select the shape of the snip, a “+” sign appears on the screen and you have to drag the cursor and cover the area of the screen that you want to take a screenshot of.
Step 5: As soon as you release the cursor, a new window will appear and the area that you had selected for the screenshot will automatically paste into Snipping Tool.
Step 6: Now, move your cursor to the “Save” button to save a snip on your laptop. You can save the snip in an HTML, PNG, GIF, or JPEG format.

Conclusion
That’s it! So these are the three options that you can follow to save a screenshot on your Dell laptop. Hope you will find the article helpful; you can get back to us in the comment section below, if in case of any query.
Leave a Reply